
Oh no! You’ve been drilling away, maybe installing a shelf, hanging up some art, or fixing a pipe, and suddenly… oops! You hear that cringe-worthy sound—the drill bit has gone too deep and pierced your PVC pipe. The flow of water stops, the wall gets wet, and you’re left with a small (but significant) disaster on your hands.
But don’t panic just yet. As frustrating as it may seem, fixing a drilled hole in a PVC pipe doesn’t have to be the nightmare you think it is. There’s hope. And better yet, you don’t have to tear down the entire wall to fix it. Let’s walk through it, step by step, so you can handle this with the expertise of someone who’s been there, done that—and learned a thing or two along the way.
Step 1: Take a Deep Breath and Turn Off the Water
The first thing you should do after drilling into a PVC pipe is not to pull your hair out. Instead, stop what you’re doing, take a deep breath, and turn off your water supply. This will prevent the water from flowing through the pipe and potentially causing more damage.
Look for the main water valve to your home. It’s usually located in your basement, garage, or outside near the water meter. Turning it off will ensure you’re not flooding the area while you get to work.
Step 2: Dry the Area
Next, get yourself a towel or a rag and dry the area around the hole. The last thing you want is a soggy mess as you work on your repair. Drying the pipe and the surrounding space makes it easier to see the hole clearly and gives the materials you’re about to use a better surface to adhere to.
If water continues to drip out of the hole, use a bucket or bowl to catch the drips. You can also wrap the pipe with a rag to slow down the water flow until you can get to the repair.
Step 3: Assess the Damage
Before you rush into any repairs, take a moment to assess the damage. Is the hole small, like a pinprick? Or has your drill made a bigger, more substantial hole? If it’s a tiny puncture, you might not need anything too fancy to fix it. If it’s larger, then you’ll need a more substantial repair method.
For small holes (think: under 1/8-inch), a simple patch might suffice. But anything larger requires a more substantial fix—possibly using a PVC pipe repair clamp or an epoxy-based solution.
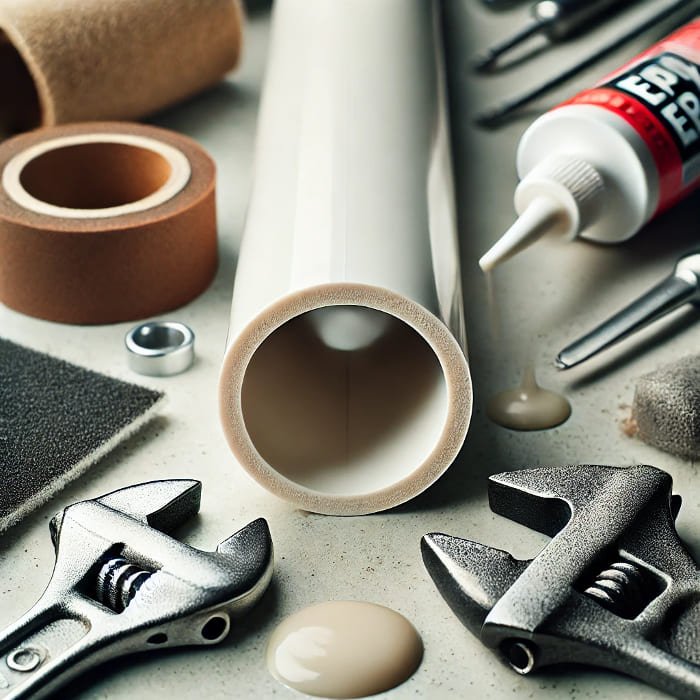
Step 4: Gather Your Materials
Here’s the thing: the tools and materials you’ll need to repair your PVC pipe depend on the size of the hole. But fear not, most of these can be found at any hardware store for a reasonable price. Here’s a quick list of what you might need:
- PVC Pipe Repair Clamp – These are perfect for larger holes and can be clamped around the pipe, providing a quick fix without the need for any cutting.
- PVC Epoxy or PVC Cement – If the hole is relatively small, a heavy-duty epoxy or PVC cement may work wonders. These sealants will bond the pipe back together with a tight seal.
- A Rubber Patch – If you need to buy some time before you can make a permanent repair, a rubber patch with hose clamps will do the trick.
- Sandpaper or a Scraper – To smooth out the area around the hole.
- Rags and a Bucket – For cleanup.
Step 5: DIY Quick Fix – Using a Rubber Patch and Hose Clamp
If the hole is relatively small and you don’t want to make a permanent fix just yet, a rubber patch and hose clamps will work as a temporary solution.
- Cut a piece of rubber (like a small section from an old bike tube or a thick rubber glove) that’s large enough to cover the hole and extend a little beyond the edges.
- Place the rubber patch over the hole.
- Using a hose clamp (or two), tightly secure the rubber over the hole. Make sure it’s snug but not too tight to avoid causing further damage.
This patch will keep your pipe sealed until you can get the right materials to fix it permanently.
Step 6: Going for the Permanent Fix – PVC Epoxy or Cement
For a permanent repair, your best bet is to use a PVC epoxy or cement solution. Here’s how you do it:
- Clean the Area – Use a rag to clean the area around the hole. You don’t want any dirt or debris interfering with the adhesive bond.
- Roughen the Surface – If you’re using epoxy, it’s a good idea to sand the surface around the hole lightly. This helps the epoxy or cement bond better.
- Mix the Epoxy – Follow the manufacturer’s instructions for mixing the two parts of the epoxy (if you’re using a two-part epoxy). Be sure to mix thoroughly.
- Apply the Epoxy – Using a putty knife or similar tool, carefully spread the epoxy over the hole, covering the area generously. For large holes, you might need to apply several layers.
- Wait for the Cure – Let the epoxy cure as per the instructions. It usually takes about 30 minutes to 1 hour for it to set, but you should leave it for a full 24 hours before turning the water back on.
If you’re using PVC cement (for small cracks or pinholes), simply apply the cement around the hole, making sure to coat it evenly. PVC cement will harden quickly, creating a strong, water-tight seal.
Step 7: Test the Repair
Once your repair has set and cured, it’s time to test your work. Slowly turn the water back on, and check around the repair area for leaks. If you notice any dampness or water seeping out, it might mean the patch didn’t fully bond or that you need to reapply more epoxy or cement.
It’s always a good idea to test the repaired pipe under low pressure at first to avoid making things worse.
Step 8: Prevent Future Accidents
We’ve all been there, and accidents happen. But now that you’ve successfully repaired your PVC pipe, it’s a good time to think about prevention for the future. The key is to always double-check the area before drilling. Make sure there are no pipes, wires, or other utilities in the way of your drill.
Investing in a stud finder or pipe locator tool can help avoid accidents like this. And when in doubt, measure twice and drill once.
In conclusion, drilling into a PVC pipe can feel like a catastrophe, but it doesn’t have to be. With the right tools and a little know-how, you can repair the hole without needing to demolish your walls. Whether you go for a quick fix with a rubber patch or a permanent repair with epoxy, the important thing is staying calm, taking your time, and doing it right.
Accidents happen—but the key is knowing what to do when they do. And now you do! So, the next time you accidentally drill into a pipe, remember: it’s just a bump in the road, and with a few simple steps, you’ll be back on track in no time!