Gardening has always been a peaceful hobby, but in today’s world of limited space and limited time, traditional gardening methods are not practical. Enter aeroponic tower gardening – a modern, efficient and sustainable way to grow fresh produce at home.
If you’re an urban dweller or just want to take your gardening to the next level, building an aeroponic tower garden is simpler than you might think. So let’s get down to the nitty gritty!
What is an Aeroponic Tower Garden?
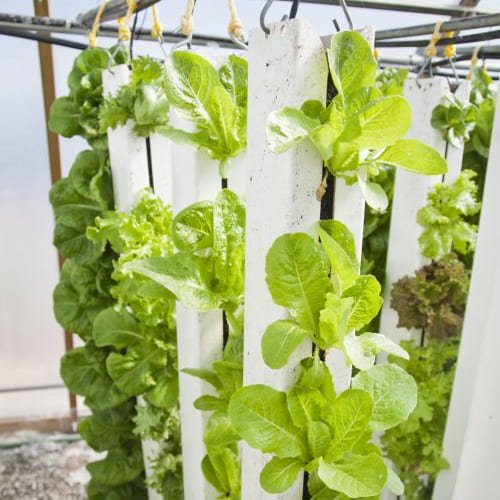
An aeroponic tower garden is a vertical gardening system where plant roots are suspended in the air and misted with a nutrient-rich solution. It’s not like traditional gardening and there’s no soil involved.
To be precise, it’s just an innovative but easy to take care of system that makes sure your plants get everything they need. It’s like your plants’ own personal spa, where nutrients and hydration are delivered right to their roots. Fast, efficient and perfect for anyone wanting to grow food at home, irrespective of space constraints.
Why Choose Aeroponics?
Aeroponic gardening is perfect for the love of many. Here are just a few:
1. Space-Saving: Ideal for small apartments, balconies or patios.
2. Water-Efficient: It uses up to 90% less water than traditional soil based gardening.
3. Faster Growth: The optimized delivery of nutrients and water means plants grow 30 to 50 percent faster.
4. Pest Control: The chances of pests and diseases are greatly reduced without soil.
5. Year-Round Gardening: Perfect for indoor or outdoor setups.
Materials You’ll Need
Here are the supplies you’ll need to build your own aeroponic tower garden. Most of these are readily available online or at your local hardware store:
- 4 inch diameter PVC pipes (5–6 feet long)
- Net pots (Small cups with holes, used in hydroponics)
- A submersible water pump (for 5-10 gallon capacity)
- A water reservoir (a 5 gallon bucket works well).
- PVC elbows and connectors
- Flexible tubing (to connect the pump to the tower)
- A timer (to automate the pump)
- Silicone glue or foam sealant (for sealing)
- LED grow lights (optional)
- Drill with hole saw attachment (to cut holes for the net pots)
- Nutrient solution (designed for aeroponic systems)
- Seeds (herbs, lettuce, and strawberries work great for beginners)
Step-by-Step Instructions
1. Plan Your Design
Begin with a good idea of how tall and how wide you want your tower. A 4 to 6 foot tower is ideal for most home setups. Decide the number of planting levels based on the size of your PVC pipe.
2. Cut the PVC Pipe
To cut the holes for the net pots, use your drill and hole saw and cut evenly spaced holes along the PVC pipe. These should be large enough for the pots to fit snugly but not fall through. Space them around 6–8 inches apart, spiraling upwards for a balanced look.
3. Assemble the Tower
Seal your pipe by attaching a PVC cap to the bottom of it. If the base is unstable, use some connectors and elbows to stabilize. Place the pipe vertically on a sturdy stand or directly onto the reservoir lid, making sure that the pipe stands and stays upright when mounted.
4. Prepare the Water Reservoir
Drill a hole in the lid of your 5-gallon bucket to pass the flexible tubing through. Connect the tubing to the submersible pump and place the pump inside the bucket. Fill water in the bucket and add the nutrient solution according to label instructions.
5. Connect the Pump to the Tower
Run the tubing from the pump to the top of the tower and secure it. With this setup, the nutrient rich water will be pumped to the top of the pipe, trickling down and misting the roots.
6. Insert Net Pots and Plants
Put your seedlings in the net pots, so that the roots hang freely below. Insert the pots into the holes you drilled earlier. Don’t overcrowd; allow each plant some space to grow.

7. Set Up the Pump Timer
Attach the timer on your pump and set it to mist the roots every 15–20 minutes. This guarantees the plants will always be given a consistent water and nutrients without waterlogging the roots.
8. Add Lighting (If Indoors)
If your tower is in an indoor or low light area, install LED grow lights around the structure. Position the lights to cover all sides for even growth.
Maintenance Tips for Success
Monitor water levels: Top the reservoir, and check the reservoir, regularly. The nutrient solution must be diluted correctly.
Clean the system: Tubing, reservoir, and pump should be cleaned every 4–6 weeks to keep them from clogging and as to prevent algae buildup from taking place.
Prune regularly: Trim plants to make sure they are healthy and will not get too crowded.
Rotate crops: Try a variety of plants to see which one grows the best inside your setup.
Best Plants for Aeroponic Tower Gardens
Aeroponics is versatile, but some plants do better than others. Here are some top picks:
- Leafy Greens: Lettuce, kale, spinach
- Herbs: Basil, mint, cilantro
- Compact Fruits: Cherry tomatoes, strawberries
Plants to Avoid:
- Large root vegetables (like carrots or potatoes)
- Fruiting plants that are heavy, like pumpkins
- Plants that need a lot of pollination
Cost Breakdown
Here’s a rough estimate of what you’ll spend:
Initial Setup: $100–$200 (depending on materials)
Monthly Maintenance: $20–$50 (nutrients and replacements)
Final Thoughts
Although building an aeroponic tower garden may seem intimidating at first, once you have your plants fantastically growing in their modern day vertical home, you’ll know that it was more than worth it. Not only will you get fresh, homegrown produce, but you’ll also help to sustain gardening practices.
So, what are you waiting for? Begin building your very own aeroponic tower garden today using those PVC pipes, get out your engineer hat, and make it happen! Happy gardening! 🌱


